Record music, performances, and tutorials in any format.
Recorder Manual
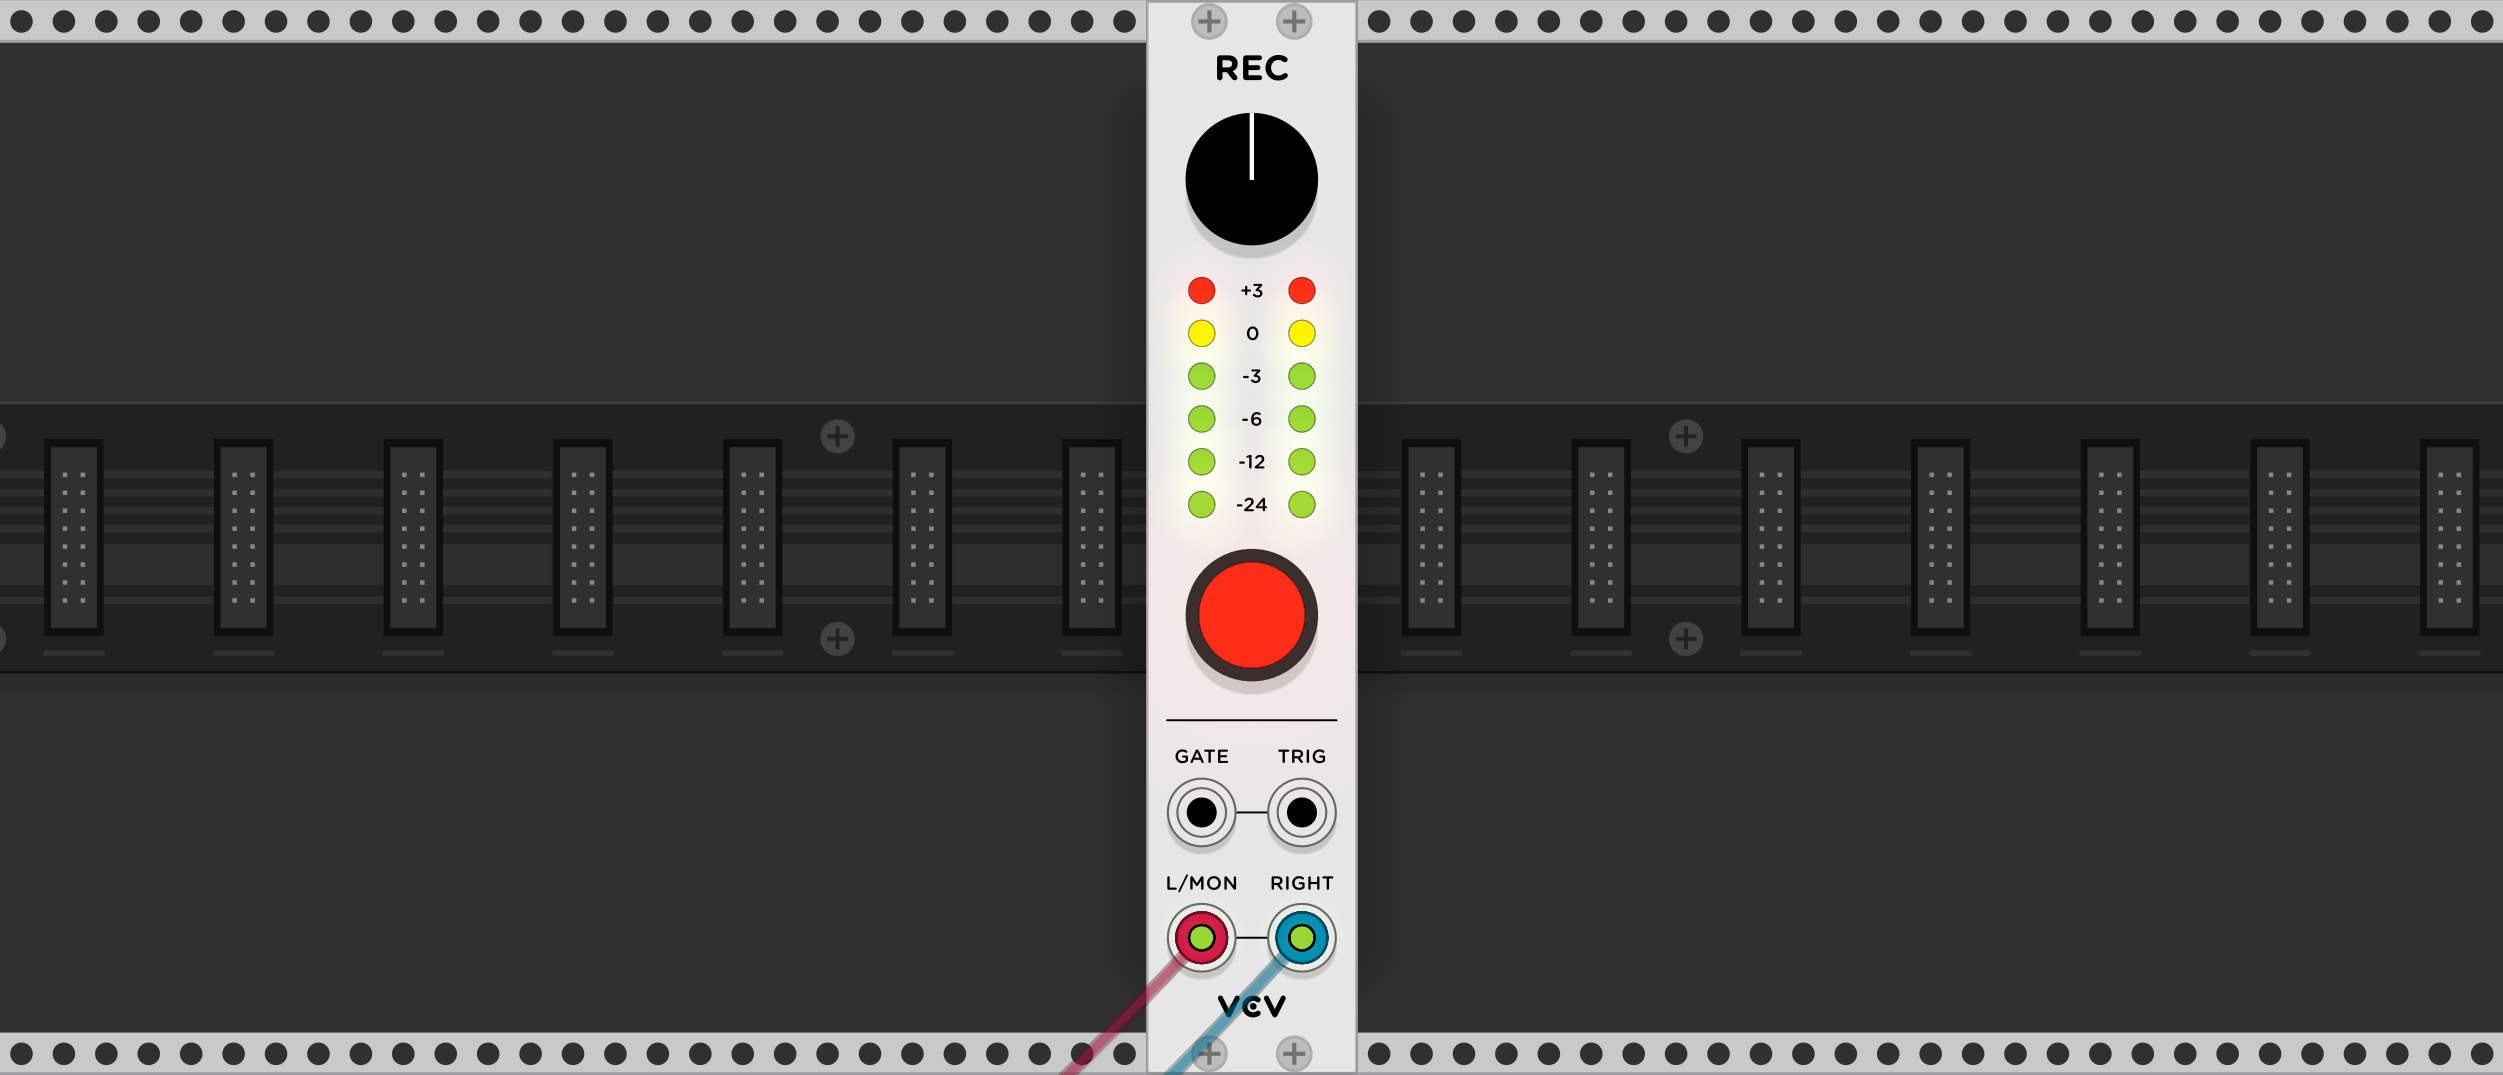
VCV Recorder records mono/stereo audio and optionally screen-captured video to several popular file formats.
Audio
To record audio, patch an audio signal into the L/MON input, or a stereo audio signal into the L/MON and RIGHT inputs. If both audio inputs are patched, the recorded file will be stereo (2 channels), otherwise it will be mono (1 channel).
Adjust the level knob to apply gain or attenuation to the recorded signal. If the VU meter displays a red light, the audio is clipping, so it would be a good idea to decrease the level to avoid distortion.
Recording
Click the record button to begin recording. If you have not set an output file path yet, a file dialog box will appear. Once a file is selected, recording will begin. To change the output file path, right-click the panel and click the path under “Output file”.
By default, VCV Recorder appends a 3-digit number to each successive recording after the first, such as Recording-001.wav, Recording-002.wav, etc.
To disable this behavior so existing recordings are overwritten instead, right-click the panel and disable “Append -001, -002, etc.”
You can automate recording with a gate or trigger signal. Patch a gate into the GATE input to start recording when the gate turns on and stop recording when the gate turns off. This is useful when generating many small recordings, such as variations of percussion hits. Alternatively, patch a trigger signal into the TRIG input to toggle the recording state when a trigger is generated. This is useful for starting/stopping recording with a MIDI controller through VCV MIDI-CV or VCV MIDI-CC.
You can select the audio or video format and settings by right-clicking on the panel while recording is stopped. If you need a particular format that is not available, or your editor cannot open a file produced by VCV Recorder, create a bug report or feature request for the plugin.
Audio formats
- WAV (.wav): uncompressed PCM. 16/24-bit depth.
- AIFF (.aif): uncompressed PCM developed by Apple. 16/24-bit depth.
- FLAC (.flac): lossless compression developed by the Xiph.Org Foundation. 16/24-bit depth.
- ALAC (.alac): lossless compression developed by Apple. 16/24-bit depth.
- MP3 (.mp3): lossy compression developed in 1993. 128-320 kbps.
WAV and AIFF require the least CPU to encode but the most disk space.
Bit rates can be calculated with the formula: bit rate = bit depth * channels * sample rate.
For example, a stereo 16-bit WAV at 44.1 kHz is 1,378 kbps.
FLAC and ALAC require more CPU to encode but typically use 50-70% the bit rate (and therefore disk space) as WAV/AIFF. These formats are lossless, so the audio quality is exactly identical to a live Rack performance.
MP3 is a lossy format, so it is most suitable for mass distribution where small file sizes are required.
Video formats
- MPEG-2 (.mpg): lossy video compression developed around 1996. Uses MP2 audio encoding.
- H.264 (.mp4): lossy video compression developed around 2003. Uses AAC audio encoding. Only available when building VCV Recorder from source.
- FFV1 (.avi): lossless video compression developed in 2003
- HuffYUV (.avi): lossless video compression developed around 2000
MPEG-2 and H.264 are widely supported by video editors and players. The video and audio quality can be set by adjusting the corresponding bit rates.
FFV1 and HuffYUV are uncommon formats, but they can be re-encoded into other formats using ffmpeg after recording. Audio is encoded as 16-bit PCM with both of these formats. Since they are lossless, the video/audio quality is exactly identical to a live Rack performance.