Manual
Rack
Plugin Development
- Tutorial
- API Guide
- Panels
- Manifest
- Presets
- Voltage Standards
- Digital Signal Processing
- Migrating v1 Plugins to v2
- Licensing
Rack Development
Appendix
Rack Pro Features
VCV Rack Pro allows you to use Rack as a plugin in your DAW, as well as a standalone application. It also includes a collection of exclusive Pro modules. This page documents all features exclusively available in Rack Pro.
- Plugin formats
- Audio input/output
- MIDI input/output
- Parameter automation
- Offline rendering
- Pro Modules
Plugin formats
VCV Rack Pro supports the following DAW plugin standards.
- VST2
- VST3
- Audio Unit (macOS only)
- CLAP
We test and support VCV Rack Pro in the following DAWs.
- Ableton Live
- Cubase
- FL Studio
- Reason
- Bitwig
- Reaper
- Mixbus
- Studio One
- Cakewalk
- Logic Pro
- GarageBand
Other DAWs may run Rack but are unsupported by VCV.
All Rack plugin formats can be used as an instrument and effect (FX) plugin. Instrument plugins are useful for patches that can be played with MIDI (or are self-running), while effect plugins are ideal for processing audio. However, both audio and MIDI can be sent to Rack regardless of type, if your DAW allows routing audio/MIDI to plugins.
If you need to change the plugin format of VCV Rack in your DAW project, or even switch DAWs or projects while keeping the same VCV Rack patch, follow these steps.
Open the existing Rack plugin window and select “File > Save” to save a .vcv file. Replace the plugin and select “File > Open” in the new window to load the .vcv file.
Audio input/output
All Rack plugin formats include 16 audio input channels (8 stereo inputs) and 16 audio output channels (8 stereo outputs).
When Rack is used as a DAW plugin, use one of the VCV Audio modules with the “DAW” driver to access the plugin’s audio inputs/outputs. Channels 1 and 2 are the plugin’s main left/right audio channels routed within the DAW’s channel strip, while channels 3–16 can be be routed to/from other tracks and accessed with VCV Audio 8 or VCV Audio 16 modules. All input/output channels are available in both instrument and effect Rack plugins.
Ableton Live

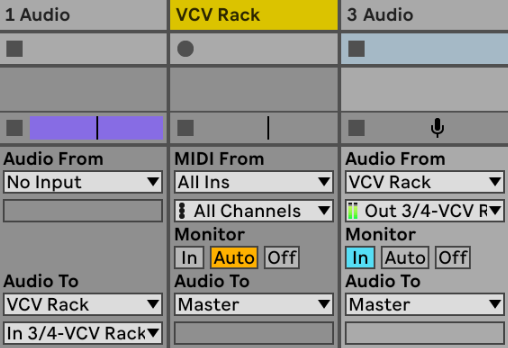
To send audio from an Ableton Live track to a VCV Rack plugin on another track, under “Audio To” select Rack’s track name and a stereo input pair.
To receive audio from a VCV Rack plugin into another track, under “Audio From” select Rack’s track name and a stereo output pair. Enable input monitoring to hear the received audio. You can use this track to record audio from Rack to Live’s Arrangement View or Session View.
Logic Pro
If you wish to use multiple stereo outputs of a VCV Rack instrument plugin, use the plugin’s “Multi-Output (8xStereo)” variant. Open Logic’s mixer, and press the small “+” button near the bottom of Rack’s track to create up to 7 Aux tracks, automatically routed from Rack’s 3–4, 5–6, 7–8, etc outputs. These Aux tracks can be routed to the Master track, hardware Outputs, or Buses which can be used as inputs to other audio tracks for recording. See Use multi-output instruments in Logic Pro for Mac in Logic’s manual for more details.

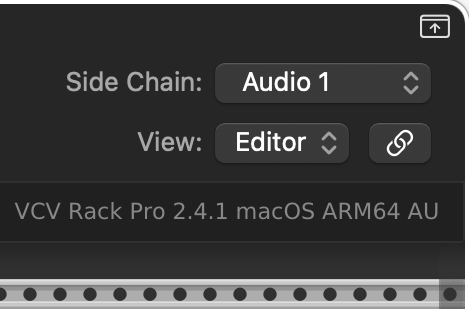
Logic Pro allows VCV Rack to receive an additional stereo audio input from a track, input, or bus by clicking the “Side Chain” dropdown in Rack’s editor window. As an instrument plugin, Rack receives this side-chain input on channels 1–2. As an effect plugin, Rack receives it on channels 3–4. Unfortunately, Logic does not allow Audio Unit plugins to receive more than one stereo side-chain input.
MIDI input/output
MIDI from your DAW can be sent to a Rack plugin and handled by any VCV MIDI input modules. Most DAWs are capable of sending VCV Rack the following types of MIDI messages.
- Data messages on channels #1-16 such as notes, pitch wheel, aftertouch, and CC (Control Change).
- Transport events from the DAW timeline such as start, stop, continue, and 24 PPQN (pulses per quarter note) clock.
- Song position of the DAW timeline.
- SysEx (System Exclusive) data.
You can also receive MIDI output from any VCV MIDI output modules into a DAW track, to control another plugin or external hardware, or to record to a MIDI clip.
Ableton Live

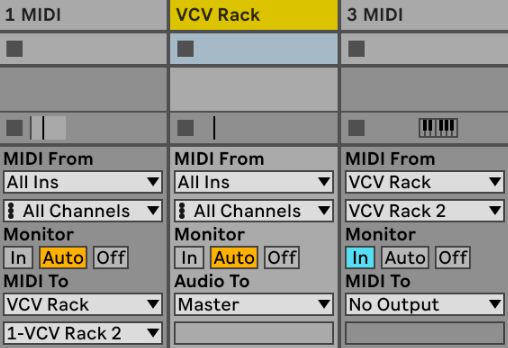
To send MIDI from an Ableton Live track to a VCV Rack plugin on another track, under “MIDI To” select Rack’s track name and the “VCV Rack” plugin.
To receive MIDI from a VCV Rack plugin into another track, under “MIDI From” select Rack’s track name and the “VCV Rack” plugin. Enable input monitoring to receive the MIDI. You can use this track to record MIDI from Rack to Live’s Arrangement View or Session View.
Note: Ableton Live routes all MIDI data to MIDI channel #1. This means that MIDI controllers generating MIDI data on channels #2–16 will appear on channel #1 of Rack’s MIDI input modules. See “What MIDI channels does Live support?” in Live’s manual.
Parameter automation
You can automate any parameter (knob, slider, button) of a Rack module using your DAW. To record parameter automation, make sure automation recording is enabled in your DAW (if applicable), start recording, and move any parameter in Rack’s window. When played back, the module’s parameter will move exactly as recorded.
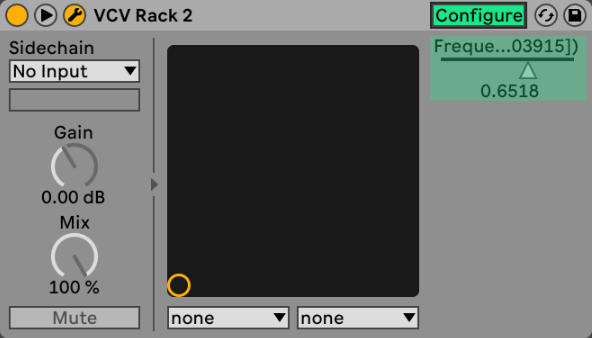
Many DAWs allow you to control plugin parameters using a MIDI controller. To map a MIDI CC control or keyboard note to a module’s parameter, enable your DAW’s MIDI assignment feature, wiggle or click the module’s parameter, and then wiggle or press the physical control.
Note: If you delete a module in Rack, the DAW’s automation clip will not be deleted but will become ineffective. It is recommended to delete automation clips of deleted modules, since Rack may reuse automation slots for parameters of newly created modules, which can cause arbitrary parameters to be mistakenly automated.
Ableton Live

To record any Rack module’s parameter in Ableton Live’s Arrangement View or Session View, enable Automation Arm and record a clip. All parameters adjusted in VCV Rack will be recorded in the track. See Automation and Editing Envelopes in Live’s manual for more details.
To map a hardware MIDI control (CC) to any VCV Rack module’s parameter in Ableton Live, enable MIDI Map Mode (Ctrl-M or Cmd-M), move a MIDI control, and move a parameter in Rack. The MIDI control will now adjust the parameter in Rack. See Making custom MIDI Mappings in Live’s manual for more details.
Offline rendering
VCV Rack can render audio offline (faster than real-time) using your DAW’s “render”, “bounce”, “bake”, “mixdown”, or “export” feature. This allows you to render hours of generative modular music in only a few minutes of processing time. For example, if your Rack patch uses about 10% CPU, a 10 minute song can be rendered in just 1 minute.
Pro Modules
VCV Rack Pro includes VCV Pro Modules, a collection of premium effect modules not available in VCV Rack Free. This is included as an extra thanks for your purchase of VCV Rack Pro.